
Affiliate Disclaimer - As an Amazon Associate I earn from qualifying purchases.It supports the website. So, Thank you
One of the greatest things about bees is that it’s perfectly easy for anyone to start their own colony. You can do this from the comfort of your backyard and while there is some preparation involved, once the hive is set up, it’ll almost look after itself. If you’ve been looking for information on how to start a bee colony, you’re in the right place.
To start a bee colony, you will need a variety of equipment including a hive, hive tools, and of course, bees. It’s also very important to do as much research as possible so your colony stands the greatest chance of survival.
Table of Contents
Why Would You Want To Start A Bee Colony?
I know a lot of people who have considered starting a bee colony but aren’t entirely sure why they should. Yes, it can be a very interesting hobby and something to pass the time but there’s so much more to keeping bees.
For starters, bees are under threat due to things like habitat loss and climate change. To this end, it’s really important that humans provide safe nesting spots and access to food sources which is something you’ll be doing as a beekeeper.
But why does it matter that bees are under threat? That surely doesn’t affect you and me, does it? Well, actually it does because bees are important pollinators. In fact, it’s reported that bees pollinate around 70% of all human crops. Without them, there’s a direct negative impact on our food sources.
Another great reason to start a bee colony is for your own education. Being up close and personal with wildlife like this can really open your eyes to how amazing bees are. If you have children and want to help them get closer to nature then this is a great way to do it.
Moreover, if you establish a healthy colony, you will be able to harvest honey and other bee products. You can either use these yourself or sell them for a profit. Some people even enjoy beekeeping so much that they purchase more hives and start a beekeeping business.
When Is The Best Time To Start A Bee Colony?
Have you ever noticed that you don’t see many if any, bees during the winter? That’s because honey bees hide out in their hives when the weather gets cold so starting a colony in fall or winter isn’t usually a good idea.
While summer is possible, most people agree that spring is the best time to start as it gives the colony plenty of time to establish before it has to face its first winter. Once you start seeing the flowers bloom and the weather warms up, you can start getting your hive ready.
However, I would advise you to work quickly because the more time the bees have to forage, the better. Once you have your hive set up, introduce the bees as soon as possible.
It is also worth noting that, when you purchase a box of bees, they’ll arrive very close to starvation so you will need to provide them with food supplements until they become self-sufficient.
But it’s not a difficult task as you can make your own sugar syrup at home using equal parts sugar and water. Bring the mixture to a boil and then remove it from the heat to allow it to cool before offering it to your colony. The benefit of this is that sugar syrup is a man-made version of the nectar that bees collect from flowers so it’ll provide them with all the energy they need.
It can take some time for the colony to establish but as the weather gets warmer, the queen will start laying more eggs and the workers will be gathering lots of food. However, it is essential that you continually monitor the colony’s progress so you can stay on top of any problems.
Generally speaking, if you start your colony in the very earliest part of spring, you should start to see it becoming self-sufficient around May. At this point, you can back off a little and allow the colony to look after itself. Although there will be some maintenance involved which I’ll discuss in more detail later on.
Where Should You Place Your Bee Hive?
If you want your bee colony to thrive then correctly placing the hive is a must. You don’t need to have a massive amount of space to install a hive in your garden but there may be local regulations that limit where it can be placed. It’s important to check these out before you start as moving as bee hives can be a big job and should be avoided at all costs.
One of the first things you will need to think about in terms of placement is whether there are enough viable food sources nearby. I’m not saying that you have to have a blooming garden filled with flowers (although that will help) but consider the local area and how many food sources are close by.
Bees will travel up to five miles from their hive when foraging but they also go in search of water so it’s worth installing a water source if there isn’t a natural one within easy reach.
I’d also encourage you to consider the direction in which your hive faces. Generally speaking, it’s accepted that placing the hive so it faces east or southeast is best. On top of this, you should find somewhere that the hive is going to be sheltered from strong winds.
Also, be sure to place it on a level surface and make sure that the hive is stable and won’t fall over or be knocked down.
Is It Difficult To Start A Bee Colony?
When you consider that a single bee colony can contain tens of thousands of individuals, you could be fooled into thinking it’s going to be a lot of work. But the great thing about beekeeping is that, once the colony is well-established, you don’t need to do too much.
What’s more, there’s no need for any certifications or licenses so anyone can get started right away. Although, again I will point out that there may be local regulations you have to follow. But as long as you have an outdoor space to place your hive, you’re good to go.
It is important to keep in mind that initially setting up a colony does come with its challenges. Many beekeepers lose their colonies in the first year but this is largely due to a lack of preparation and insufficient resources. This is why it’s super important to educate yourself and carefully plan what you’re going to do.
You may also find it a little nerve-wracking when it’s time to deposit the bees into the hive. However, there are many items of protective clothing you can use (which I’ll talk about later) and, as long as you stay calm, you should receive a minimal number of stings.
How Much Does It Cost To Start A Bee Colony?
Another thing that a lot of people worry about when starting a bee colony is the cost. But the good news is that this is a relatively affordable hobby to get going with. Compare it to something like fishing and it’s nowhere near as expensive.
Of course, if you’re a complete newbie then you will need to invest in all of the necessary equipment as well as a box of bees to get you started. But generally speaking, you may spend anywhere between $400 and $800 to begin with.
There are ways to reduce costs such as building your own hive or catching a swarm of bees but this isn’t always easy if you’re a complete beginner.
But one of the great things about beekeeping is that it’s a hobby that gives back so you should see this as an investment. Once the colony is established, it will pollinate any crops and fruit trees in your garden and provide you with bee products like wax and honey. All of these things can be sold, making you a little extra money on the side.
What Do You Need To Start A Bee Colony?
As I have discussed, there are costs involved when starting a bee colony and that’s largely because there is quite a lot of equipment you’ll need to buy. I often see these bee starter kits online which contain a hive, a bee suit, and tons of tools. However, you don’t always need every tool that comes in these kits and when you’re just getting started, it’s best to buy only what’s essential.
Bees
You can’t start a bee colony without bees! While I did mention earlier that you could catch a swarm, without experience, this isn’t the easiest thing in the world so most newbies choose to buy bees from a supplier or a beekeeper.
Normally, these suppliers start taking orders for bees in December or January and you’ll receive your bees at the beginning of spring. However, it’s worth keeping in mind that supplies are limited so you’ll want to place your order as early as possible.
Bees are usually delivered in one or two ways; in a bee package or a nuc. A bee package is simply a box of bees that typically contains around 10,000 individuals. That equates to around 3 lbs of bees. Inside the box, you will also get a caged queen as well as some sugar syrup so you can feed the bees while they are transported.
A nuc, or a nucleus, comes in a small hive that usually contains around five frames. The great thing about this is that the bees will have been kept inside the nuc long enough to have accepted the queen and start building honeycomb. Although this is usually the more expensive option.
Just like humans, honey bees have races and you may find things like Russian, Italian, and Caucasian bees. It is also possible to purchase hybrid varieties of honey bees that have been bred to be more productive or more resistant to disease. However, it’s worth speaking to a local beekeeper who will be able to give you advice on the best type of bee to start your colony.
Hive
Your bees are going to need somewhere to live and for honey bees, that’s a hive. This is one of the first things you should buy so that your bees have a home once they arrive.
There are lots of different types of hives although the Langstroth hive is typically considered to be the best for beginners. It is made up of a bottom board, a brood box, and honey supers. Inside these hives contain eight or ten frames which have a foundation on which the bees can build their comb. However, it is worth keeping in mind that inspecting these hives means removing boxes and this can be challenging and will almost certainly upset the bees.
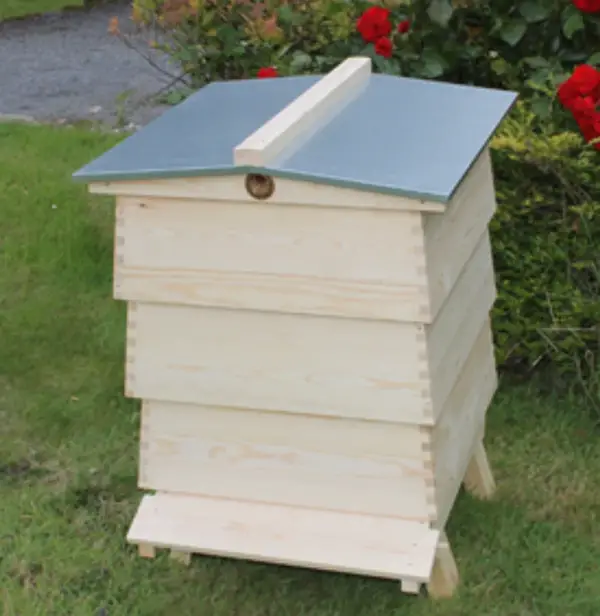
The warre hive is my personal favorite as this is designed to mimic the inside of a hollow tree so it’s more natural for the bees. This is a vertical hive with two top bars where the bees build their comb downwards. There’s a box at the top which is used to house sawdust to prevent excess moisture from dripping into the hive.
There are also horizontal hives such as the long Langstroth and the top bar hive. These do not have frames although you can place a divider to separate the brood area from the honey. As with the warre hive, these horizontal hives use top bars to support the honeycomb and are generally much easier to inspect.
Tools
Earlier I talked about beekeeping starter kits that are packed with lots of tools but more often than not, you won’t use half of them! That’s why I always tell beginners to invest in just three essential tools; a smoke, a hive tool, and a bee brush.
The smoker is used when it’s time to inspect the hive because smoke quells a bee’s sense of smell so it’ll be less threatened by your presence. Moreover, smoke disrupts the bee’s ability to communicate so individual members cannot alert others to the supposed threat meaning there’s less chance of getting stung.
But don’t worry, the effects are only temporary so using a smoker won’t do any harm to your bees. In fact, they’ll be back to normal in as little as 20 to 30 minutes.
Hive tools are another important thing to invest in when starting a bee colony and you’ll use them at almost every inspection. These are hand-held tools that can be used for a variety of things including lifting boxes or frames, scraping off substances like wax, and even removing stingers from your skin.
Finally, your bee brush is used to gently brush bees out of the way as you perform a hive inspection. It’s essential to swipe upwards and be very delicate as you do this as you don’t want to harm the bees. As you move through your beekeeping journey, you may find that you need the bee brushless but in those early days, it’s something you won’t be able to live without.
Protective Clothing
You may have seen videos online of apiarists not wearing any protective clothing and if you want to do that, then that’s your choice. However, you have to keep in mind that these people have been beekeeping for years and have become accustomed to being stung as well as having learned ways to work with the bees to minimize stings.
When you’re just starting out, wearing protective clothing could be the difference between you loving or loathing your new hobby.
There are lots of different types of protective gear you can choose when working with bees and one of the most common is a full bee suit. These consist of a full body covering as well as a veil and gloves. However, you can purchase these items separately.
I would also recommend a good, strong pair of leather boots that fit tightly around your ankles. Sleeves and pant legs should also be elasticated to prevent bees from flying inside.
Setting Up The Hive
Now that you have everything you need, it’s time to set up your hive and get your colony started. This can be a very exciting time but it’s important not to rush the process or skip any of the following steps.
Adding The Bees To The Brood Box
In order to add your bees to the brood box, you’re going to need to take out some of the frames as this makes it easier to get them inside.
If you’re a little nervous about releasing the bees then try spraying them with sugar syrup as this can help to calm them a little.
You may need to give your box a few shakes to get all of the bees inside but for the most part, they’ll be keen to investigate.
Put The Frames In
Once the bees are happily inside the hive, you will now need to replace any frames you took out earlier. Do this slowly and gently to avoid upsetting or harming the bees.
Install The Queen
Your queen will come in a separate cage and this should be installed between two of the frames inside the hive. These cages usually come with a plug which can be removed or you might try replacing it with something sweet, like marshmallow, which the bees will eat through to reveal the queen. When this happens, she will release pheromones that allow the other bees to accept her.
Provide Some Food
It’s really important to provide food supplements for a new colony as they won’t yet have the honey they need to survive. As I discussed earlier, sugar syrup is the best option and you can buy bee feeders which can be attached to the hive. Alternatively, you might try making your own bee feeder using an upturned mason jar and placing it on two thin strips of wood within the hive.
The Final Steps
Now that you’ve done everything, you will need to leave the hive alone for a couple of days to allow the bees to settle in. After this, I would recommend checking to make sure that the queen is released and accepted. Otherwise, there’s not much else to do.
Down the line, as your colony grows, you may wish to install more honey supers or even upgrade to a bigger hive.
Maintaining Your Colony
Looking after a bee colony is fortunately not a lot of work. If you’re looking for a hobby that only requires a couple of hours (potentially less) each week then this could be perfect for you. However, maintaining and inspecting your hive is essential if you want your colony to survive so here are some of the things you’ll need to do.
- Inspect your hive at least once every two to three weeks. However, you should limit the number of times you open the hive during winter to avoid exposing the bees to cold weather.
- Check the health of the queen
- Look at how many bees are currently in the colony and assess whether they have enough space.
- Regularly assess the amount of food stores the bees have and offer supplements if you feel there isn’t enough. This is particularly important over the winter.
- Check your colony for signs of disease of parasites and take the necessary remedial action where required.
- Consider the disposition of the colony. Do they seem particularly aggressive or angry or are they calm?
- Look at the condition of the hive and its components. From time to time, you may need to make repairs or eventually replace the hive altogether.
- Before winter, you’ll need to prepare the hive by providing extra food, installing pest excluders, waterproofing the hive, and checking the overall condition of the colony
- Harvest your honey and other bee products. But keep in mind that your colony will need sufficient honey for winter so do not take too much. The healthier and larger your colony gets, the more you’ll be able to harvest without affecting it.
Further Education
Even when your colony is successfully established, it’s really important to make sure that you continue doing your research.
Being a beekeeper comes with many different challenges and the more information you can arm yourself with, the better.
There are many websites (including this one) and online resources that provide a wealth of information. But if you prefer to chat with other like-minded people then you may consider joining a beekeeping association. I created a list of all of these types of associations across North America so it’s easy to find one that’s local to you.
You may also find lots of books both online and in stores and these can be invaluable in teaching you how to properly maintain your colony and what to do when things go wrong.
Final Thoughts
Keeping bees can be an incredibly rewarding and enjoyable hobby with it’s not without its challenges. If you’re looking at how to start a bee colony then you need to be well prepared and make sure that you have all of the right equipment.

